
The Boomi NetSuite connector talks to NetSuite through SuiteTalk SOAP web services. It is the most widely used way to connect NetSuite to Boomi: it imports NetSuite record types as profiles and supports query, get, create, update, upsert, delete and saved searches.
NetSuite has moved away from logging in with a user’s email and password for integrations. Boomi’s documentation notes that user-credential login is deprecated in favour of token-based authentication (TBA), so that is what we set up here.
Part 1: prepare NetSuite
You need administrator access for these steps.
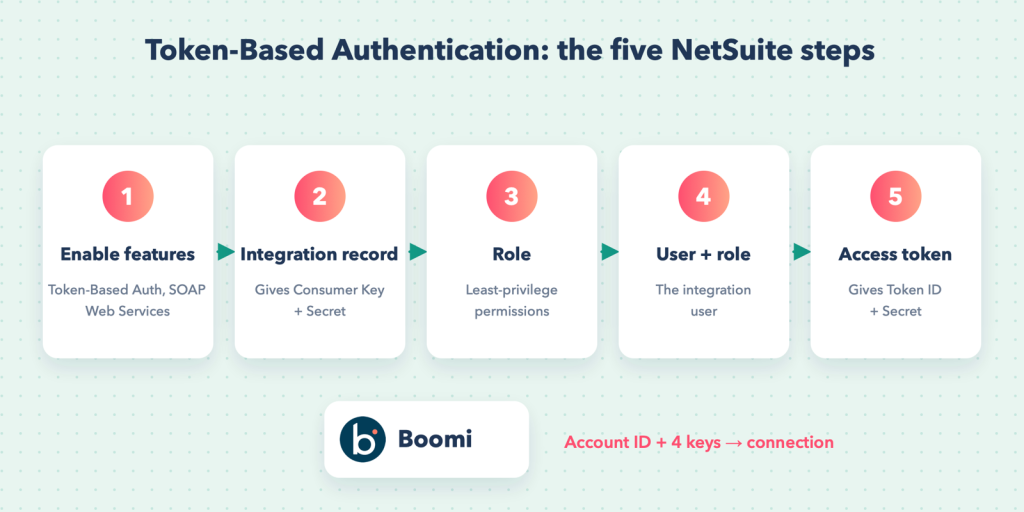
- Enable the features. Go to Setup → Company → Enable Features → SuiteCloud and enable SOAP Web Services and Token-Based Authentication.
- Create an integration record. Go to Setup → Integration → Manage Integrations → New, name it (for example Boomi), tick Token-Based Authentication and save. NetSuite shows the Consumer Key and Consumer Secret once, so copy them now.
- Create a role for the integration with the permissions it needs: Log in using Access Tokens, SOAP Web Services, and access to the specific records (customers, sales orders and so on). Keep it to the least privilege required.
- Assign the role to the integration user.
- Create an access token. Under Setup → Users/Roles → Access Tokens → New, choose the integration record, the user and the role. NetSuite shows the Token ID and Token Secret once; copy them.
Watch out: Treat the consumer and token secrets like passwords. Store them in Boomi only, never in emails or tickets. If one leaks, revoke the token in NetSuite and create a new one.
You also need the Account ID, shown under Setup → Company → Company Information. Sandboxes have IDs such as 1234567_SB1.
Part 2: the Boomi connection
| Boomi field | Value |
|---|---|
| Authentication type | Token-Based Authentication |
| Account | your NetSuite account ID |
| Consumer Key / Consumer Secret | from the integration record |
| Token ID / Token Secret | from the access token |
| Version | the SuiteTalk version you want to work with |
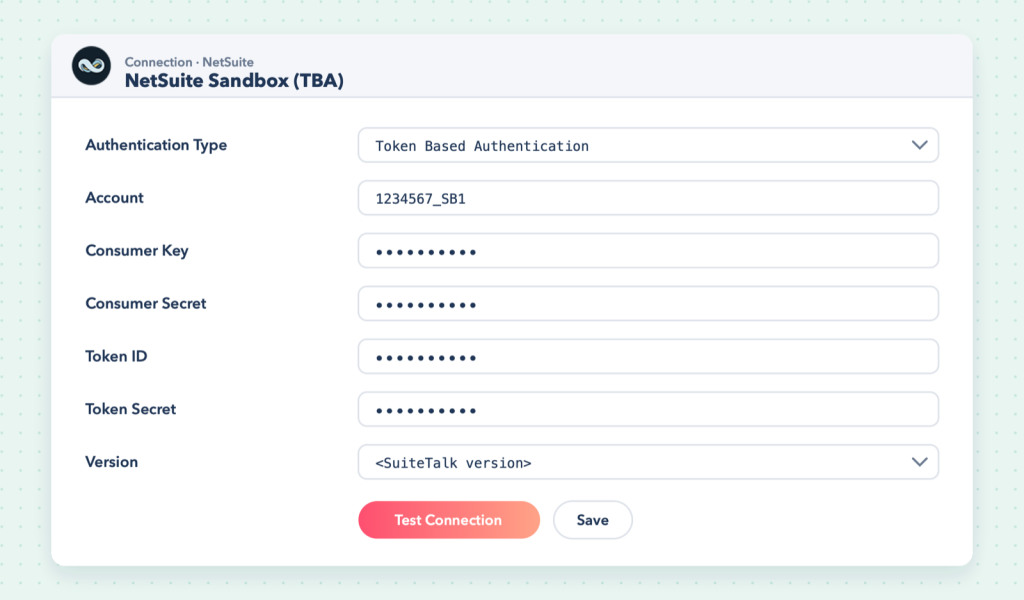
Use Test Connection. Most failures at this point come from a missing role permission or a token created for a different role or user.
Part 3: operations
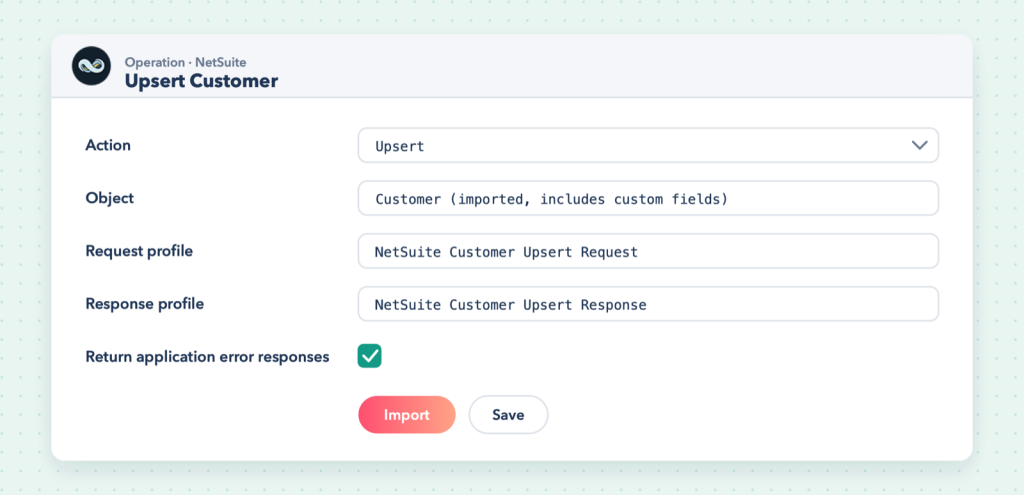
Create a NetSuite operation, choose the action, click Import and select the record type. Boomi builds the request and response profiles from NetSuite’s schema, including your custom fields.
| Action | Typical use |
|---|---|
| Query | read records using filters |
| Get | read one record by internal ID |
| Create / Update | write records |
| Upsert | create-or-update using an external ID |
| Delete | remove records |
| Search (saved search) | run a saved search defined in NetSuite |
Tip: Let NetSuite do the selecting. A saved search keeps filter logic in NetSuite where finance teams can see and adjust it, and the Boomi process simply runs it.
Example: upsert customers from a file
- Start with an SFTP Get for the customer CSV.
- Map each row to the NetSuite Customer profile, and map your source system’s key to External ID.
- NetSuite Upsert operation.
- Use the response to log internal IDs, and route rejected records to an error path.
Because the external ID identifies the customer, running the same file twice updates the records instead of duplicating them.
Troubleshooting
- Invalid login attempt: check the account ID (including the sandbox suffix), the four keys, and that the token belongs to the same integration record, user and role.
- Permission violation: add the missing record permission to the role.
- Concurrency limits: NetSuite limits simultaneous web-service requests per account; reduce parallelism in Boomi if you see concurrency errors.
SOAP or REST?
SuiteTalk SOAP via the NetSuite connector is mature and schema-driven. NetSuite’s REST API is newer and convenient for JSON-based work and SuiteQL. See Connect NetSuite with Boomi (REST) for that route.